Start a mapping session
1
From the Map tab, click New Flows on the right side of the screen, or click the icon in the left sidebar and select Mapping session.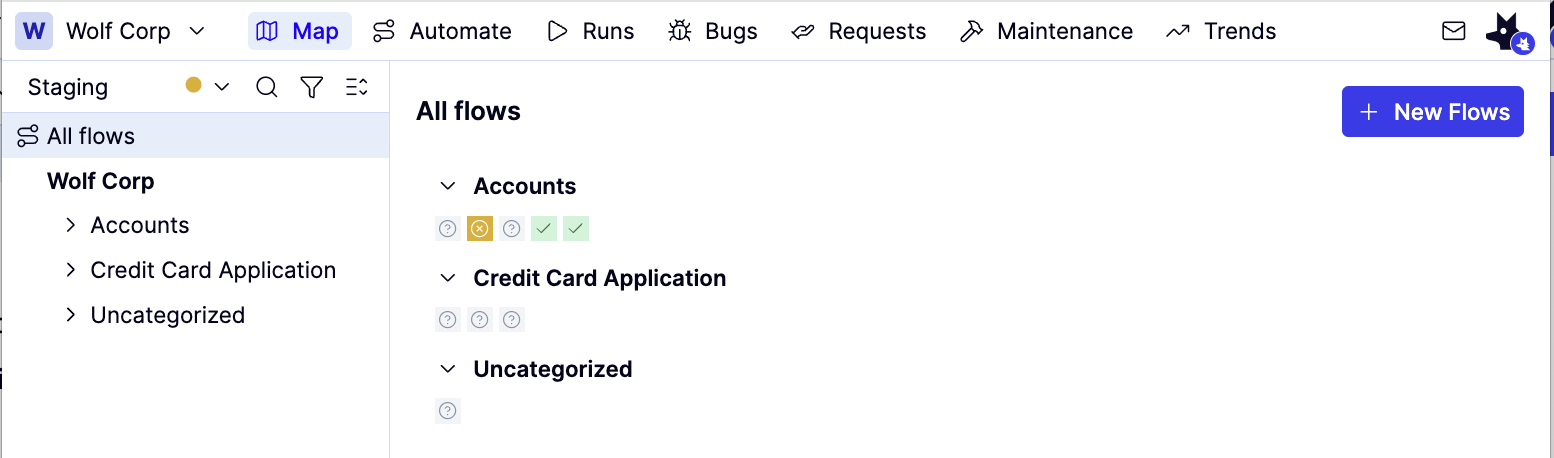
2
A new mapping session opens with a live browser panel in the center. The agent will ask you to confirm the URL you want to explore, or you can type your own instructions into the chat box.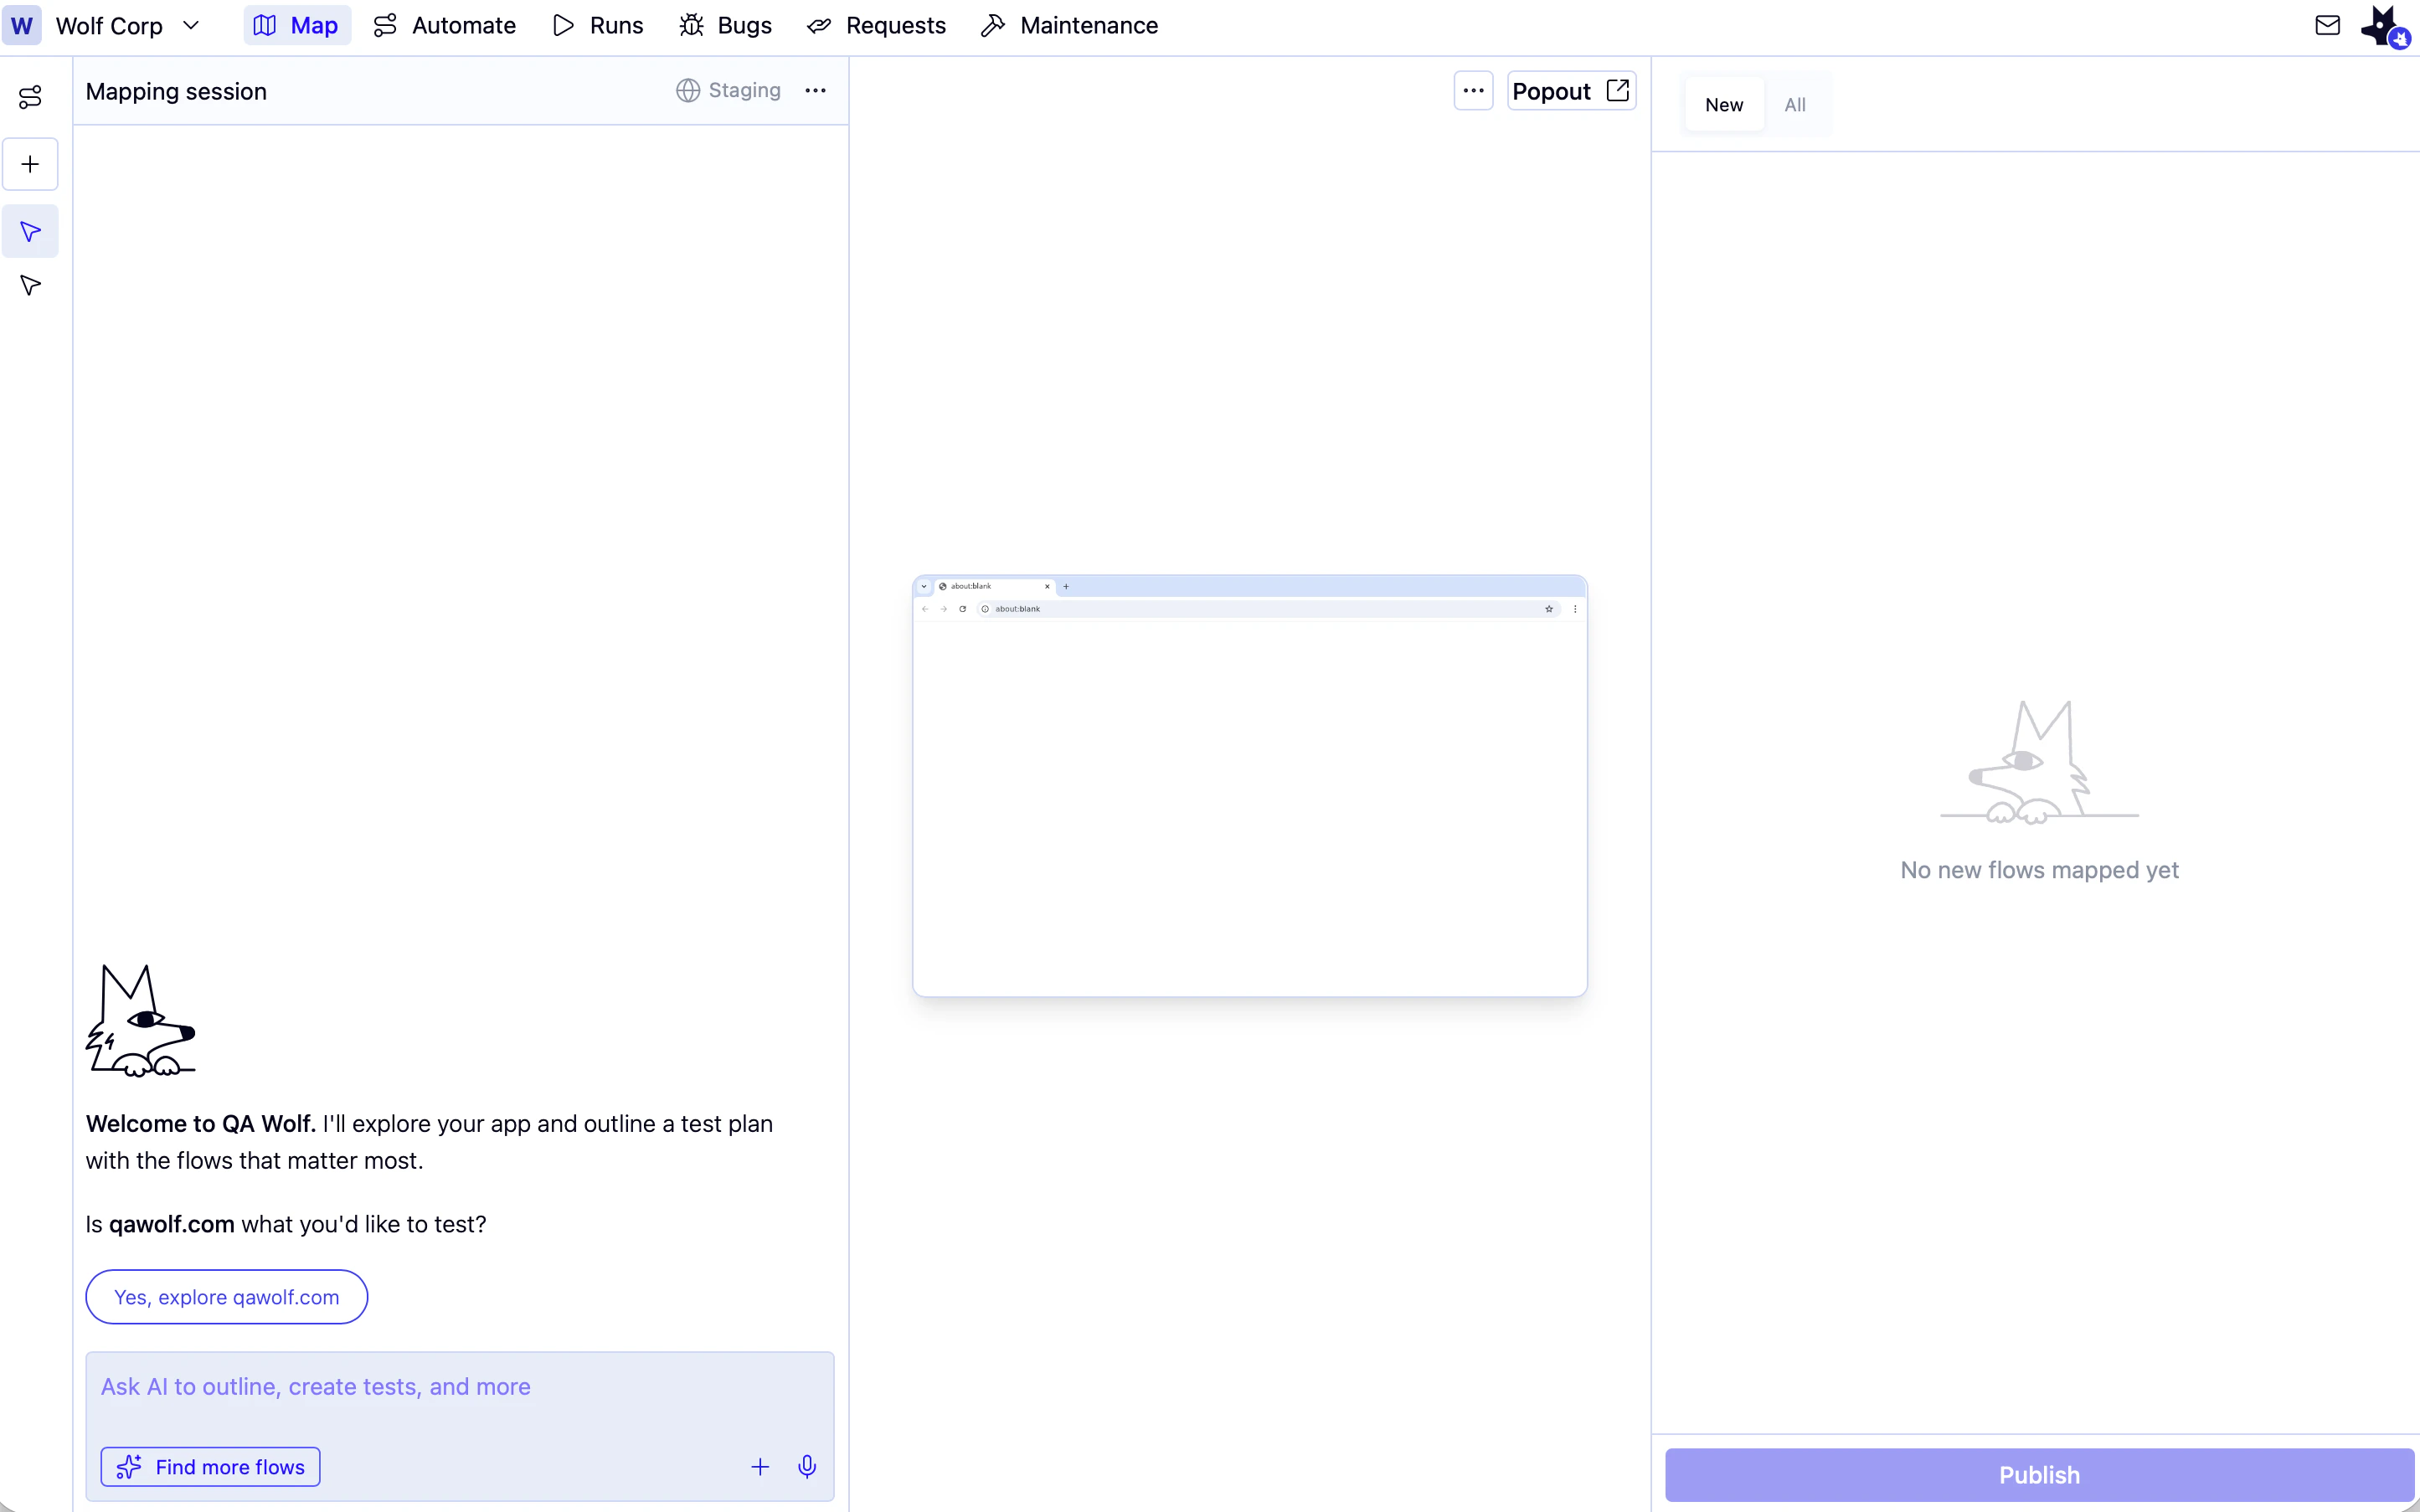
3
Type a description of what you want to map. For example: “Create a test plan for
https://yourapp.com”. You can specify a base URL, describe a specific journey, or ask the agent to focus on a particular feature area.4
Provide real-time guidance as the agent works. If the agent encounters a login prompt or needs clarification, it will ask you directly in the chat. You can respond at any time to redirect or refine the exploration.
Map from a file
Click in the chat input to attach a file, then use one of the following prompts depending on what you want.Supported file types: CSV, JSON, Markdown, plain text, and YAML.
Generate flows from a file
Parses the file and creates the folder structure and flow stubs immediately, without exploring the app. Supports most file and image types. Prompt: “Upload the flows from this file.”Map your app using a file as a guide
Uses the file as a reference while the agent actively explores your app.1
Navigate to your app in the browser panel, or include the URL and login credentials in your message.
2
Prompt: “Map all the flows in this file.”
Review and publish mapped flows
As the agent maps your application, newly discovered flows appear in the right panel. Review them before publishing.1
Review the flows in the New tab on the right panel. These are the flow stubs the agent has created.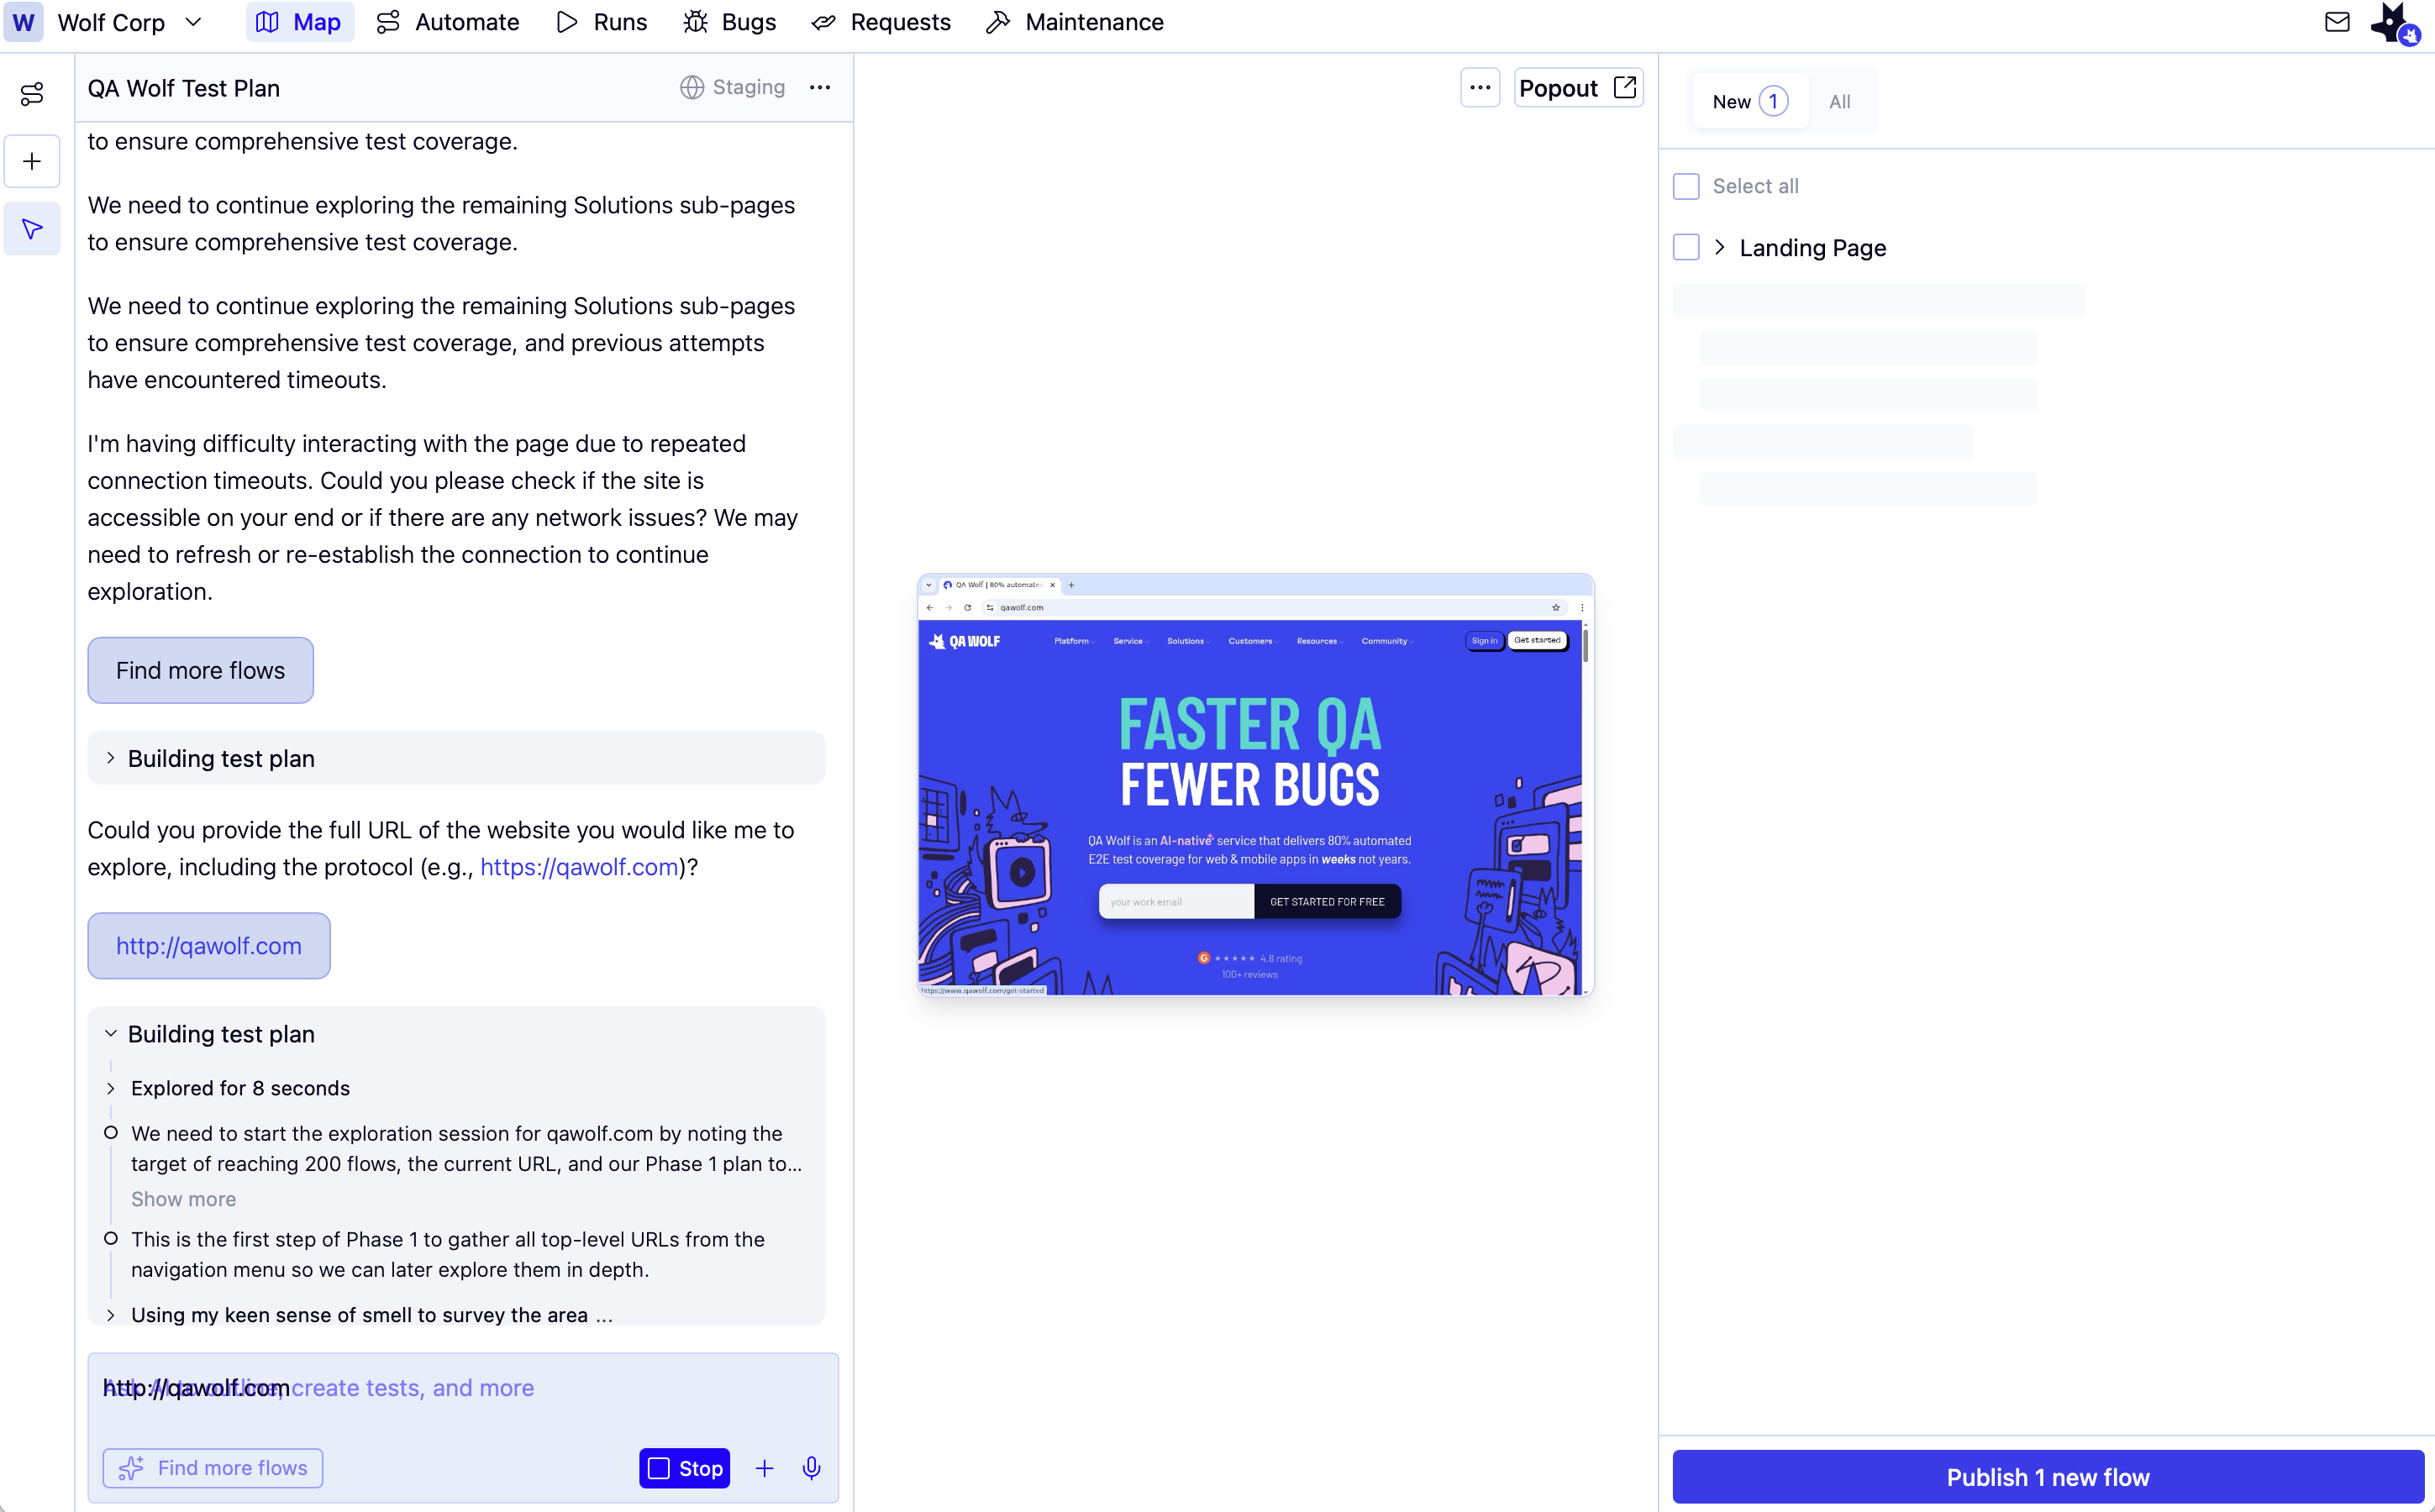
2
When satisfied, click Publish to add the flows to your coverage map. This creates the folder structure and empty flow files in the Automate tab.
Publishing during mapping creates folder structure and empty flow stubs automatically. You don’t need to review and publish manually — this happens as part of the mapping process.
Continue or revisit a mapping session
Previous mapping sessions are saved and accessible from the left sidebar. Click any session to reopen it and continue the conversation or review what was mapped. To find more flows in an area that’s already been mapped, type instructions into the chat or click Find more flows at the bottom of the chat panel.After mapping
Once published, your flows appear in the Flows view on the Map tab. From there, you can:- Review run status across all flows — see Reviewing run results
- Run flows manually — see How runs work
- Apply tags and manage readiness — see Use tags effectively
- Open a flow in the editor to write or edit code — see Create a new flow