> ## Documentation Index
> Fetch the complete documentation index at: https://docs.qawolf.com/llms.txt
> Use this file to discover all available pages before exploring further.
# How to request new coverage
> Submit a coverage request to QA Wolf through the platform, Slack, Teams, Discord, or your issue tracker.
## Request new test coverage
* Open a [coverage request](/qawolf/Request-new-coverage-29c5b2a994fb81c79523f8ff2eefde47#what-happens-next) in the platform
* Send a message in Slack, Teams, or Discord
* Tag QA Wolf in Jira or Linear. Tag the ticket with QA Wolf and we'll pick it up from there.
## What to include
We can get started with a message as simple as "New onboarding flow in staging, ready for tests," but the more detail that you provide, the less follow-up we'll need and the faster we can get the tests live.
We have found that using this format yields the best results for our customers:
**Objective:** Describe the goal of the flow you want created.
*Example: Verify the user registration process to ensure a user can register and receive a confirmation email.*
**Preconditions:** List anything that must be set up before the test can run.
*Example: Access to a user with admin permissions.*
**Steps:** Outline the actions required to achieve the objective.
*Example:*
* *Navigate to the registration page.*
* *Fill out the registration form with valid data.*
* *Submit the form.*
* *Check for a confirmation message.*
* *Verify a confirmation email is sent with correct details.*
* *Confirm that the user is created in the database.*
**Test data:** Include any specific data inputs the test will need.
*Example: A unique email address and user details for registration.*
**Expected results:** Describe what should happen if everything works correctly.
*Example:*
* *The form submits successfully.*
* *A confirmation message appears.*
* *A confirmation email is received.*
* *The user record is correctly created in the database.*
**Postconditions:** Specify any clean-up work needed after the test.
*Example: Delete the test user from the database.*
**Priority and timeline:** Indicate the priority of the request (urgent, high, medium, low) and whether you have a deadline.
**Video recording (optional):** Short walkthrough videos (e.g., Loom) aren't required but are very helpful for the team.
## What happens next
As soon as we receive the coverage request we will begin building tests. If you submitted a request via chat (Slack, Teams, Discord) or an issue tracker, a Coverage Request item will also be created in the QA Wolf platform.
### Create a new request
From the **Requests tab**, click **Request coverage** in the top right of the page.
A drawer opens.
Add the details for the flows you're requesting, set a priority, and give the request a name.
The name will appear in the **Coverage Requests** list.
Keep the name action-oriented (e.g., "Verify OTP autofill on Android and iOS.")
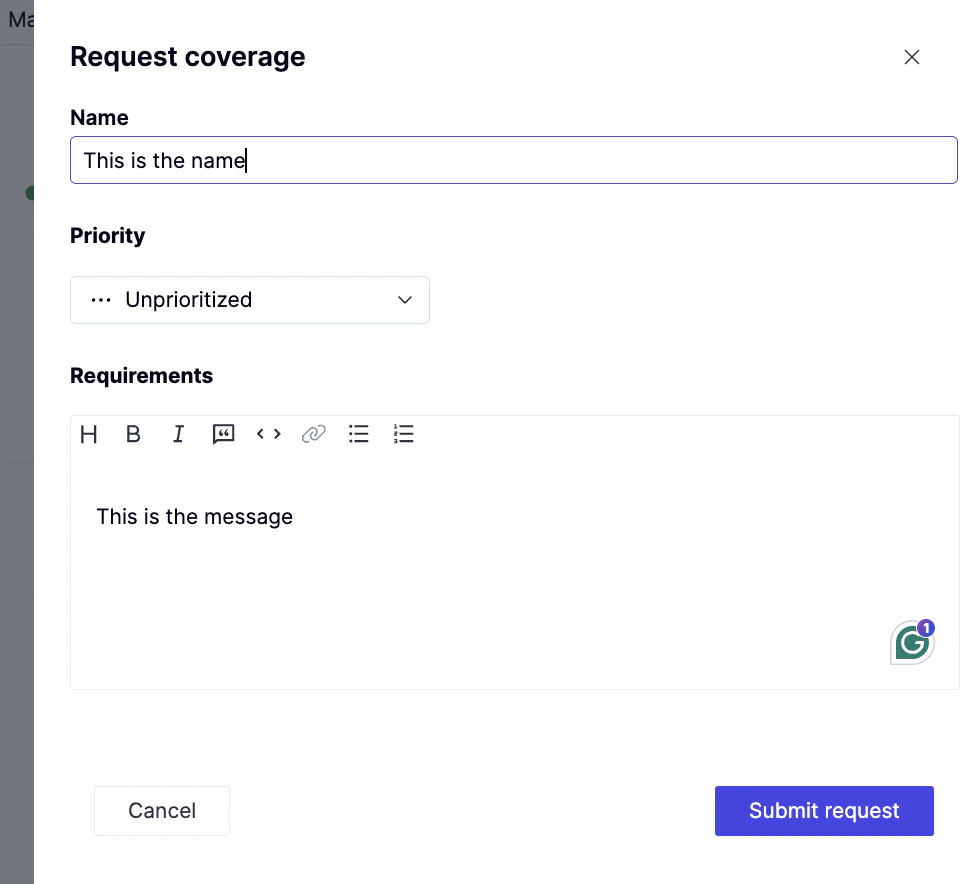 Click **Submit request** to save.
### Edit a request
Coverage requests include a set of fields that control status, priority, ownership, and how the request connects to flows.
Click **Submit request** to save.
### Edit a request
Coverage requests include a set of fields that control status, priority, ownership, and how the request connects to flows.
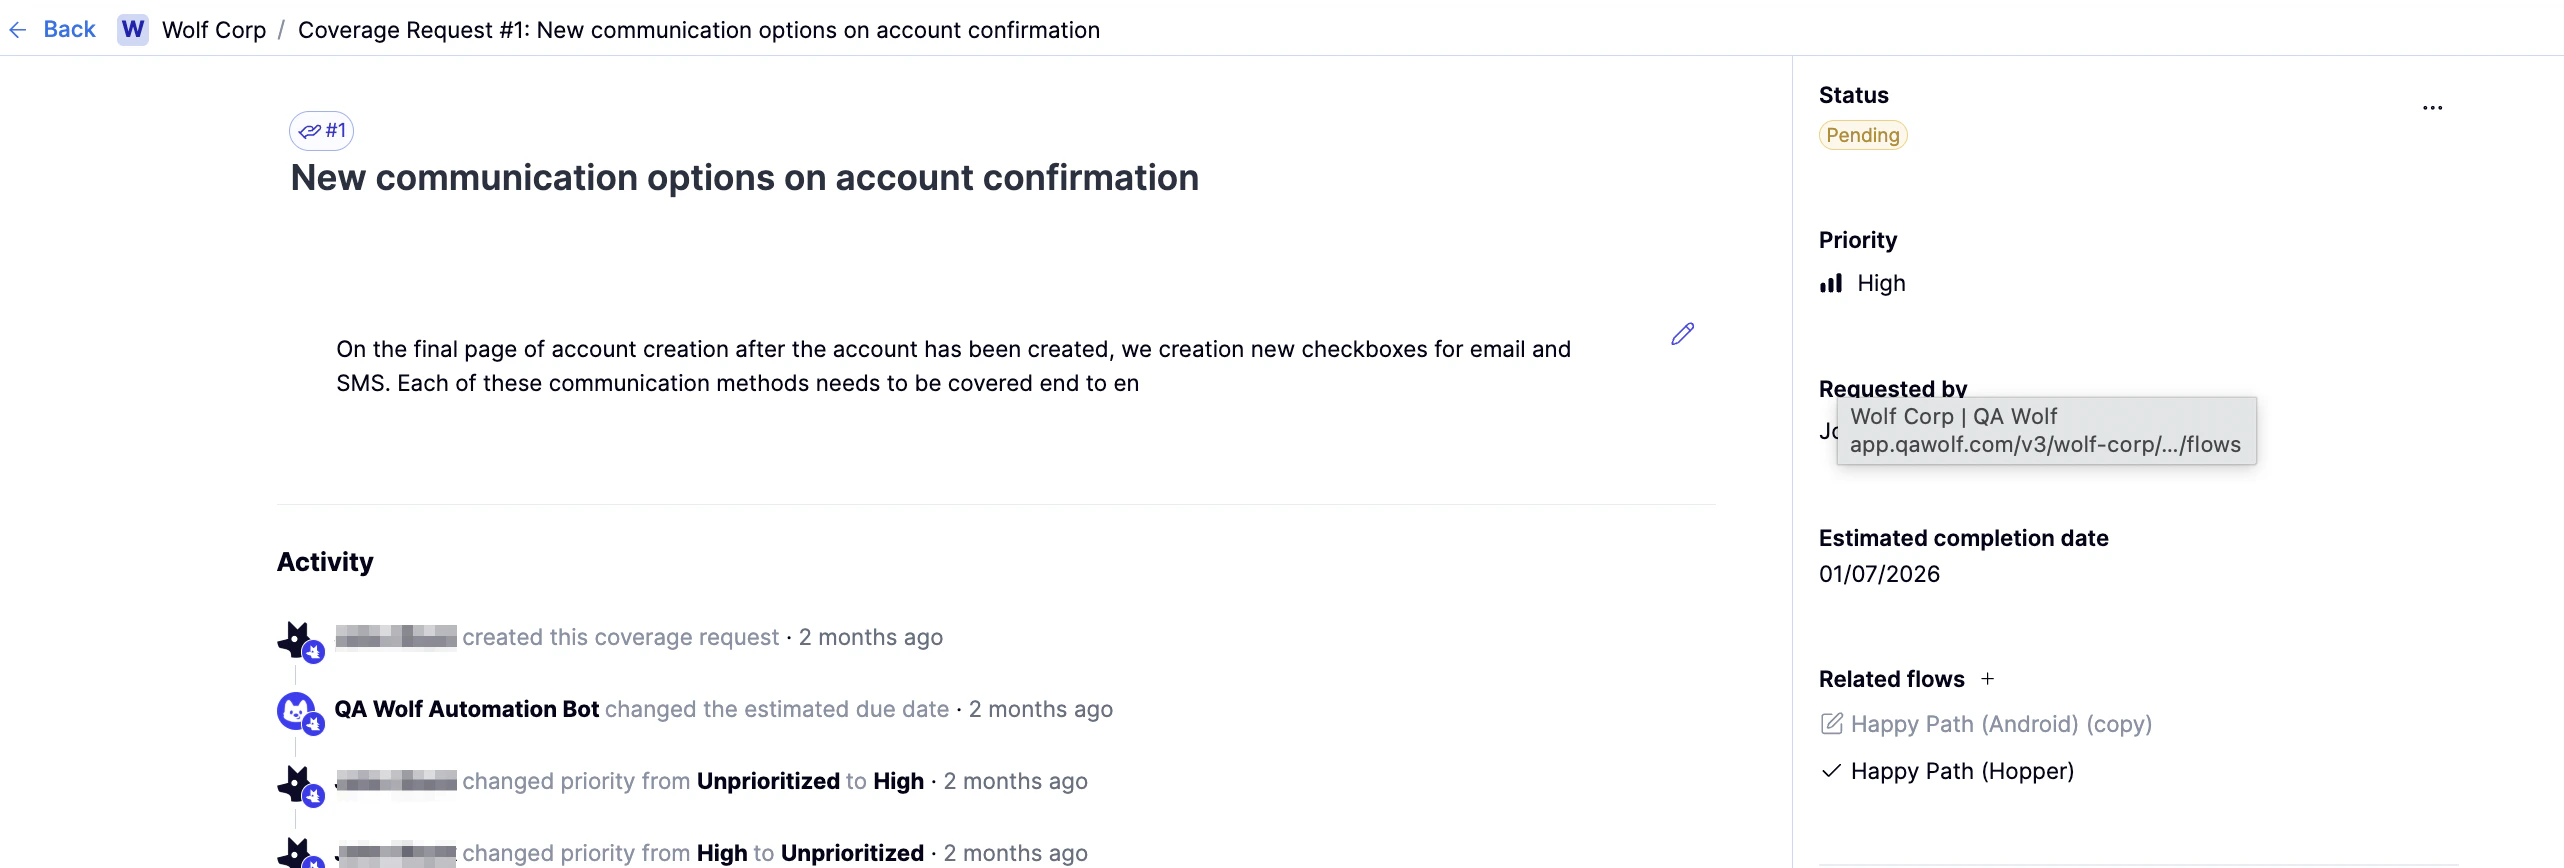 * **Name.** Edit this by clicking on the name and typing in the box. Press Enter to save the change.
* **Status.** Tracks the request's current state.
* **Priority.** Indicates the request's urgency.
* **Requested by.** Shows who opened the request and can be updated if needed.
* **Estimated completion date.** Provides a target date to help with planning.
* **Requirements.** This is the description of the requested coverage, which you can edit by clicking on the icon below the name.
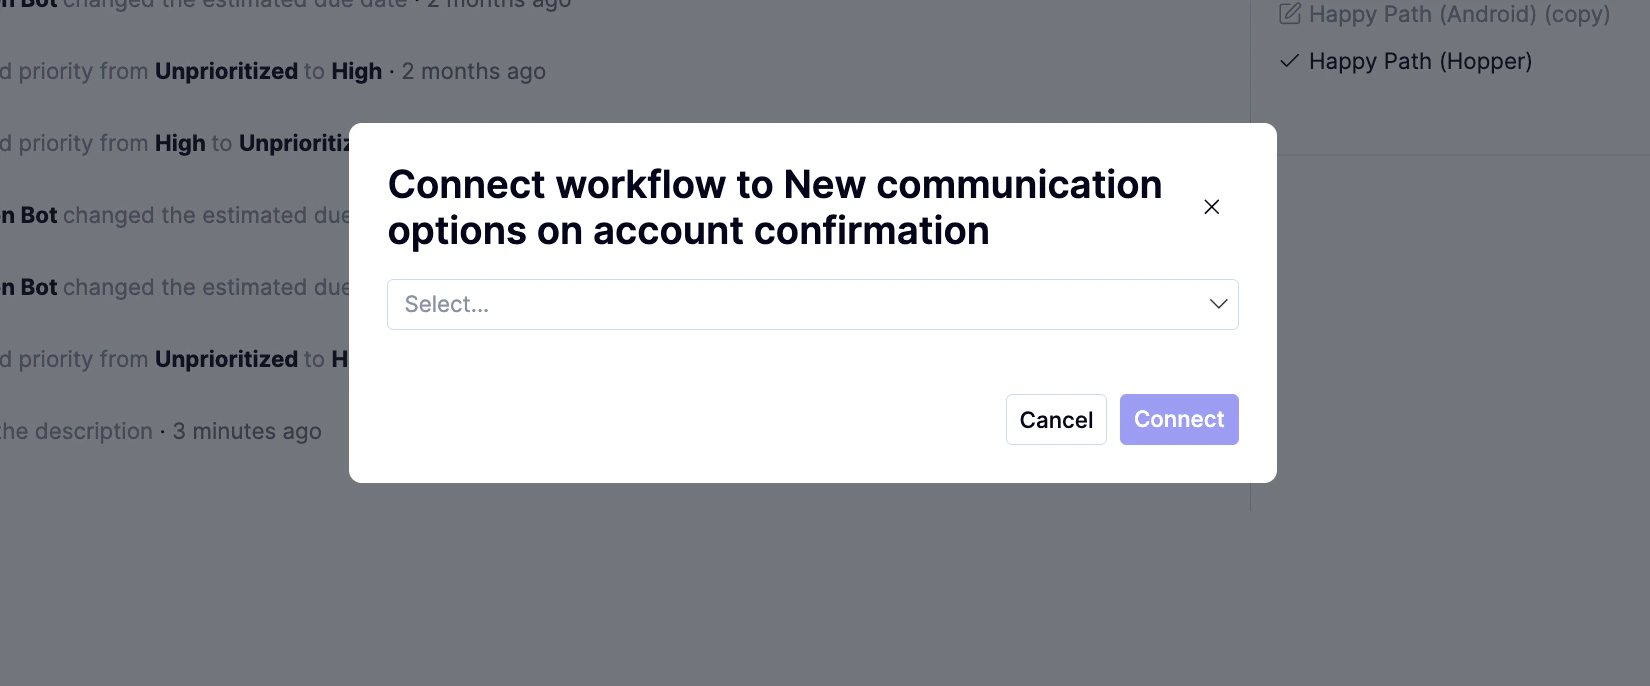
* **Related flows.** Links the request to existing flows or creates a new flow. To connect the request to another flow, click the icon in this field to select from the list of all existing flows.
* **Name.** Edit this by clicking on the name and typing in the box. Press Enter to save the change.
* **Status.** Tracks the request's current state.
* **Priority.** Indicates the request's urgency.
* **Requested by.** Shows who opened the request and can be updated if needed.
* **Estimated completion date.** Provides a target date to help with planning.
* **Requirements.** This is the description of the requested coverage, which you can edit by clicking on the icon below the name.
* **Related flows.** Links the request to existing flows or creates a new flow. To connect the request to another flow, click the icon in this field to select from the list of all existing flows.
 ### Find open coverage requests
You can find all requests for your workspace in the **Requests** tab.
* Use the status tabs on the left bar to switch between requests in different statuses.
* Use the **Search** bar to filter by request name. Use the icon to filter by request **Priority** or **Creator is me**.
### Find open coverage requests
You can find all requests for your workspace in the **Requests** tab.
* Use the status tabs on the left bar to switch between requests in different statuses.
* Use the **Search** bar to filter by request name. Use the icon to filter by request **Priority** or **Creator is me**.